Lab 1
Lab 1A
Prelab
In this prelab I connected the Redboard Artemis Nano Board to Arduino IDE, made sure that the correct port and board were selected, and installed the corresponding Apollo 3 library to run some examples to validate the set-up.
Lab Tasks
The tasks for this lab includes running a series of the examples found within libraries in order to test the set-up. The following examples were run:
Setting up Artemis to computer & selecting correct board and port.
0.1 Basics - Blink
- Apollo3 - Example4_Serial
- Apollo3 - Example2_analogRead
Unfortunately, my hands were not necessarily warm enough for the temperature sensor to drastically change in time.
- PDM - Example1_MicrophoneOutput
- The additional task that I undertook for the MAE 5190 course, was to generate a simplified electronic tuner that detected three frequencies of my choice. I choose to detect the notes A4, A5, and F4. I added the following code to the MicrophoneOutput example code, and added a tolerance of about +/- 10 Hz for each note.
 ui32LoudestFrequency = (sampleFreq * ui32MaxIndex) / pdmDataBufferSize;

  if (PRINT_FFT_DATA)
  {
    Serial.printf("Loudest frequency bin: %d\n", ui32MaxIndex);
  }

  if (ui32LoudestFrequency >= 430 && ui32LoudestFrequency<= 450 ){
    Serial.printf("Note is: A4\n");
  }

  if (ui32LoudestFrequency >= 870 && ui32LoudestFrequency<= 890){
    Serial.printf("Note is: A5\n");

  }

  if (ui32LoudestFrequency >= 340 && ui32LoudestFrequency <= 360 ){
    Serial.printf("Note is: F4\n");
  }

  else{
    Serial.printf("Loudest frequency: %d         \n", ui32LoudestFrequency);
  }
}
Lab1B
Prelab
Configuration & Codebase
This prelab consisted of me having to uninstall Python 3.14, installing Python 3.13, creating the virtual environment FastRobots_ble, downloading the codebase into my directory, and starting the Jupyter server. This was all done in order to support Artemis through Bluetooth Low Energy (BLE).
I ran the following lines of code to create and run the virtual environment:
python3 -m pip install --user virtualenv
python3 -m venv FastRobots_ble
.\FastRobots_ble\Scripts\activate
... and to activate the Jupyter server:
cd C:\Users\veren\FastRobots
.\FastRobots_ble\Scripts\activate
jupyter lab
Under the connections.yaml file I added the board's MAC address that was printed in the Arduino's Serial Monitor, updated its Universally Unique Identifier (UUID) that I got from running the following lines in both the Arduino and yaml files, and connected via BLE.

from uuid import uuid4
uuid4
The codebase contains a select number of files that are edited on different interfaces, but complement each other to run the system. The .ino file(s) is where the c++ code is written and is burned onto the board via Arduino IDE and a wired connection. We use Jupyter Notebook to edit the python files on which we write the code that interacts with and controls the firmware that has already been burned onto the device, via Arduino Bluetooth Low Energy capabilities.
Lab Tasks
The following are the tasks that were prompted for this section of the lab once everything was set-up and ready to go.
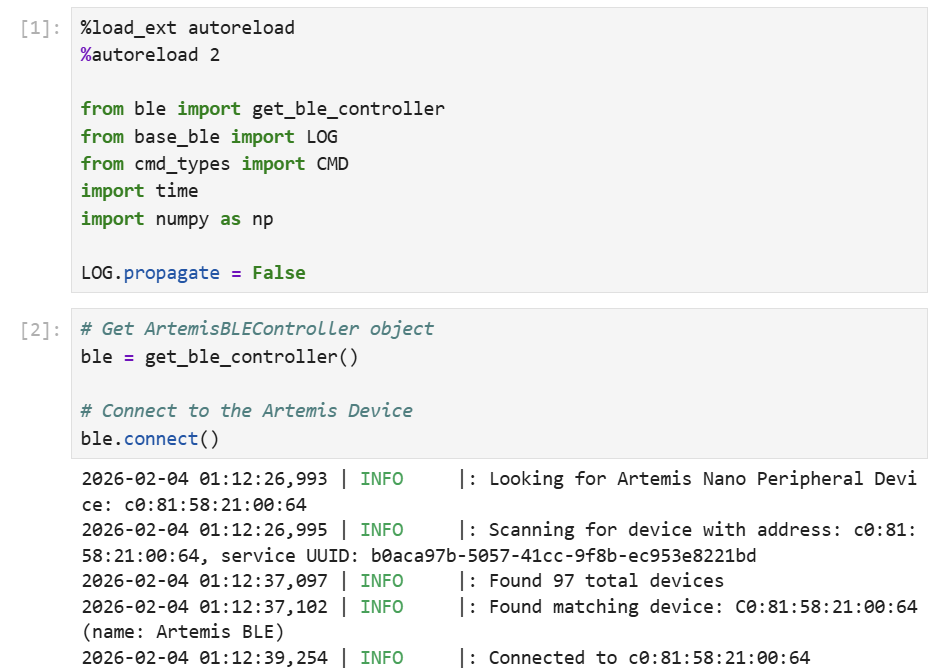
- Send a string value from the computer to the Artemis board using the ECHO command. The computer should then receive and print an augmented string.
Arduino Code:
case ECHO:
    char char_arr[MAX_MSG_SIZE];

    // Extract the next value from the command string as a character array
    success = robot_cmd.get_next_value(char_arr);
    if (!success)
        return;

    tx_estring_value.clear();
    tx_estring_value.append(char_arr);
    tx_estring_value.append(" :)");
    tx_characteristic_string.writeValue(tx_estring_value.c_str());
    Serial.print("Robot says: ");
    Serial.println(tx_estring_value.c_str());
    break;
Jupyter Lab Code: 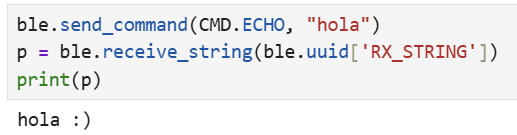
- Send three floats to the Artemis board using the SEND_THREE_FLOATS command and extract the three float values in the Arduino sketch.
Arduino Code:
case SEND_THREE_FLOATS:
    float flt_a, flt_b, flt_c;

    // Extract the next value from the command string as an integer
    success = robot_cmd.get_next_value(flt_a);
    if (!success)
        return;

    // Extract the next value from the command string as an integer
    success = robot_cmd.get_next_value(flt_b);
    if (!success)
        return;

    success = robot_cmd.get_next_value(flt_c);
    if (!success)
        return;

    Serial.print("Three floats: ");
    Serial.print(flt_a);
    Serial.print(", ");
    Serial.print(flt_b);
    Serial.print(", ");
    Serial.println(flt_c);
    break;
Jupyter Lab Code:
ble.send_command(CMD.SEND_THREE_FLOATS, "2.5|8.3|9.6")
Serial Output: 
- Add a command GET_TIME_MILLIS which makes the robot reply write a string such as “T:123456” to the string characteristic.
Arduino Code:
case GET_TIME_MILLIS:{
    unsigned long gettime = 1;
    gettime = millis();
    String tme = String(gettime);
    tx_estring_value.clear();
    tx_estring_value.append("T:");
    tx_estring_value.append(tme.c_str());

    tx_characteristic_string.writeValue(tx_estring_value.c_str());
    Serial.println(tx_estring_value.c_str());
    break;
}
Jupyter Lab Code:
ble.send_command(CMD.GET_TIME_MILLIS, "")
Serial Output: 
- Setup a notification handler in Python to receive the string value (the BLEStringCharactersitic in Arduino) from the Artemis board. In the callback function, extract the time from the string.
Jupyter Lab Code:
def notifhandler(bleuuid, bytearray):
    message = ble.bytearray_to_string(bytearray)
    text = message[2:]
    print(text)
ble.start_notify(ble.uuid['RX_STRING'], notifhandler)
The third line's purpose was to remove the "T:" from GET_TIME_MILLIS() and remain with the time value only. Everytime I would run, the notification handler would automatically show the time under the block in Jupyter.
- Write a loop that gets the current time in milliseconds and sends it to your laptop to be received and processed by the notification handler.
Arduino Code:
case LOOP_TIME:{
    unsigned long gettime = 1;
    unsigned long initial_t = millis();
    int x = 0;
    while (millis() - initial_t < 7000){
    tx_estring_value.clear();
    gettime = millis();
    String tme = String(gettime);
    tx_estring_value.append(tme.c_str());
    tx_characteristic_string.writeValue(tx_estring_value.c_str());
    Serial.println(tx_estring_value.c_str());
    x++;
    }
    Serial.println(x);
    break;
}
For the code above, and the following added cases, I add each to the connection.yaml file.
Jupyter Lab Code: 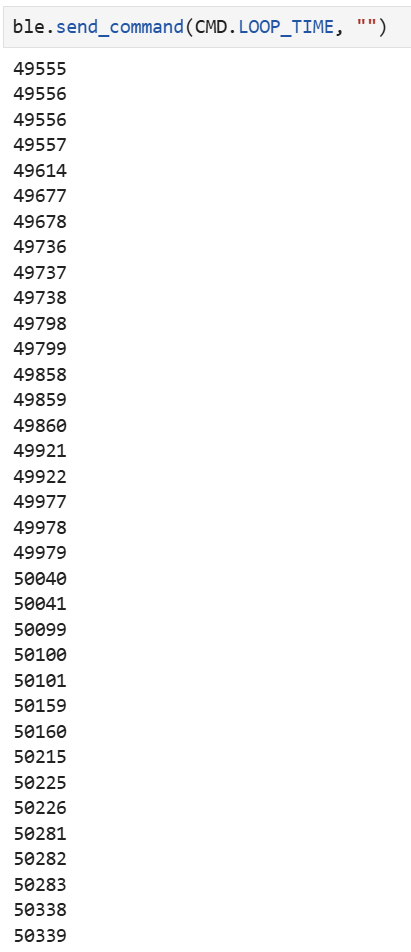
The screenshot does not show the entirety of the outputs generated. However, there were 262 outputs in about 7 seconds. If each digit represents a byte, then the data rate is approximately 187 bytes per second.
- Now create an array that can store time stamps. Then add a command SEND_TIME_DATA which loops the array and sends each data point as a string to your laptop to be processed.
Arduino Code:
case SEND_TIME_DATA:{
    for (int i=0;i<100; i++){
    currentMillis = millis();
    time_array[i] = currentMillis;
    }

    for (int i=0; i<100; i++){
    tx_estring_value.clear();
    tx_estring_value.append((double)time_array[i]);
    tx_characteristic_string.writeValue(tx_estring_value.c_str());
    }

    break;
    }
Jupyter Lab Code:
ble.send_command(CMD.SEND_TIME_DATA, "")
- Add a second array that is the same size as the time stamp array. Use this array to store temperature readings. Then add a command GET_TEMP_READINGS that loops through both arrays concurrently and sends each temperature reading with a time stamp.
Arduino Code:
case GET_TEMP_READINGS: {
    for (int i = 0; i<100;i++){
    currentMillis = millis();
    time_array[i] = currentMillis;
    float temperature = getTempDegF();
    temp_array[i] = temperature;
    }

    for (int i=0; i<100;i++){
    tx_estring_value.clear();
    tx_estring_value.append("TimeStamp: ");
    tx_estring_value.append((double)time_array[i]);
    tx_estring_value.append(" Temperature: ");
    tx_estring_value.append((double)temp_array[i]);
    tx_characteristic_string.writeValue(tx_estring_value.c_str());
    }

    break;
}
Jupyter Lab Code: 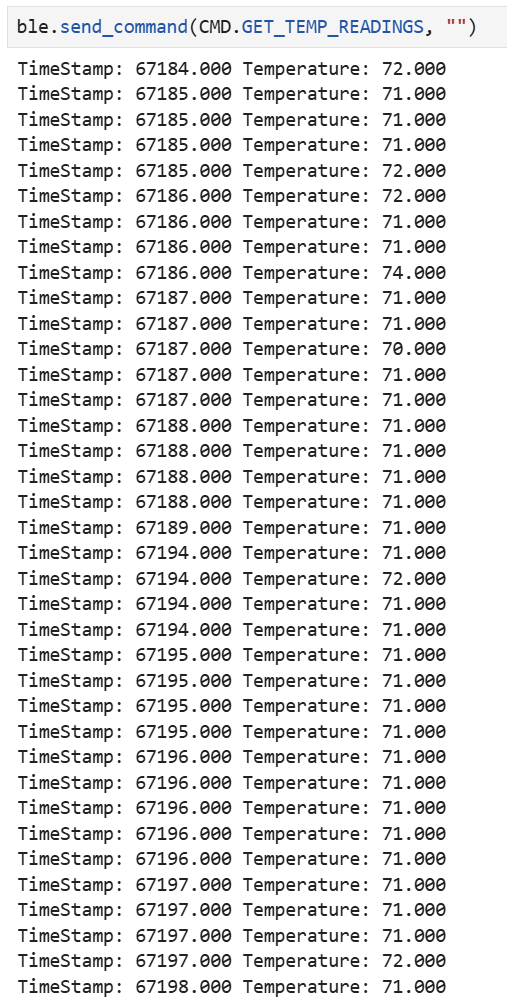
- The method implemented in Task 6 uses less memory and bandwidth, compared to the method used in Task 7 that requires more memory and longer transmission time. If each sample uses about 4 bytes for a timestamp and 4 bytes for a temperature value, then there is total of 8 bytes per each sample. Assuming the entirety of the Artemis board's RAM (384 kB) is being used, you can store approximately 48,000 bytes of data to send.
Extra Tasks for MAE 5190
- Effective Data Rate And Overhead.
Arduino Code:
case DATA_RATE_REPLY:{
    currentMillis = millis();
    char byte_arr[MAX_MSG_SIZE];
    success = robot_cmd.get_next_value(byte_arr);
    if (!success)
    return;

    int x = atoi(byte_arr);
    tx_estring_value.clear();
    tx_estring_value.append("Received time: ");
    tx_estring_value.append(String(currentMillis).c_str());
    tx_estring_value.append("\n");
    tx_estring_value.append("Message: ");
    for (int i=0; i<x; i++){
    tx_estring_value.append("1");
    Serial.println(x);
    }
    tx_estring_value.append("\n");
    currentMillis = millis();
    tx_estring_value.append("Time sent: ");
    tx_estring_value.append(String(currentMillis).c_str());

    tx_characteristic_string.writeValue(tx_estring_value.c_str());

    break;
}
Jupyter Lab Code: 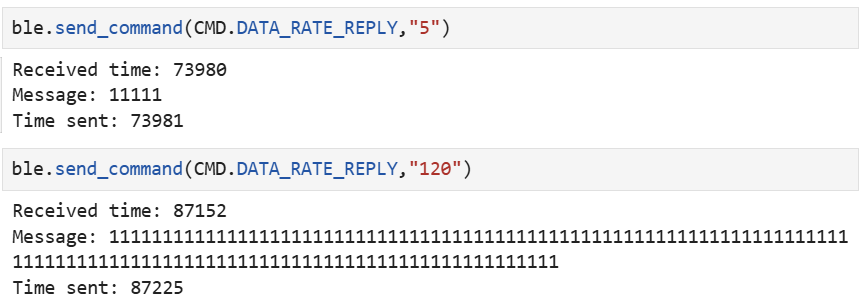
Data rate for 5-byte replies: ~40,000 bytes/s Data rate for 120-byte replies: ~13,150 bytes/s
Short packets do introduce a lot of overhead, and large replies can reduce overhead. However, once the reply is bigger than what fits in a notification, it must be split up into multiple packets, introducing much overhead and affect throughput. The measured data rate does not scale linearly with payload size. This is due to fixed BLE packet overhead and the fact that timestamps are recorded on unsynchronized clocks, introducing timing error. The graph below still demonstrates that many small packets incur significant overhead, and increasing packet size provides diminishing returns once fragmentation occurs.
After running the DATA_RATE_REPLY case that I made five times, I graphed this chart. 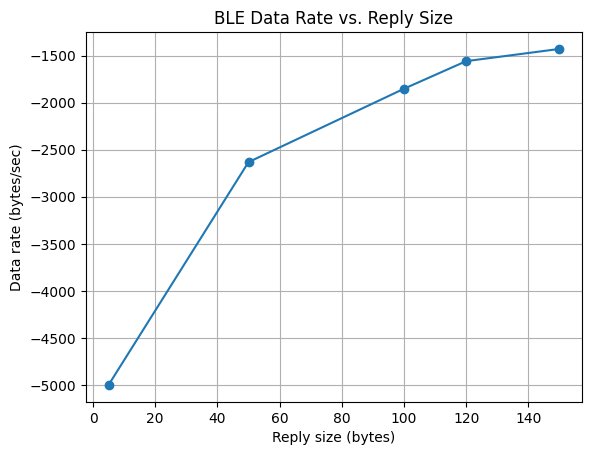
import matplotlib.pyplot as plt
sizes = [5, 50, 100, 120, 150]              # bytes
time_sent = [174288, 176767, 178003, 179051, 180034]      # ms
time_received = [174287, 176748, 177949, 178974, 179929]  # ms

delays = [(r - s)/1000 for r, s in zip(time_received, time_sent)]
data_rates = [size / d for size, d in zip(sizes, delays)]  # bytes/sec

# Plot
plt.plot(sizes, data_rates, marker='o')
plt.xlabel("Reply size (bytes)")
plt.ylabel("Data rate (bytes/sec)")
plt.title("BLE Data Rate vs. Reply Size")
plt.grid(True)
plt.show()
- At high enough transmission rates, the computer cannot receive every single packet that is published by the Artemis board, leading to significant loss in data. This is because BLE has limited bandwidth, and pack can get lost if notifications are produced faster than they can be transmitted and processed.
Resources & Collaborations
In order to accustom myself to the different platforms that we're using, understand the architecture of our system, and for help on specific commands and syntax I referenced Jack Long and Trevor Dales' sites. I also used ChatGPT mainly for debugging and syntax issues that I would run into.